|
|
Post by jeffc on Feb 28, 2006 19:53:16 GMT -6
I want to build a skinning machine this summer. I've seen Beav's but I wanted to see a variety before I built mine. If you have one lets see a pic of it and why you like yours over others you've seen.
Jeff
|
|
|
|
Post by Muskratman1 on Feb 28, 2006 20:30:09 GMT -6
Here's one I made Jeff. I like it for the 7 1/2 foot ceiling as it has adjustable arms on it. It bolts to the wall and I just step on the black strip on the floor to hold it down or you could anchor it in the concrete too if you wanted. Sure saves on the back. 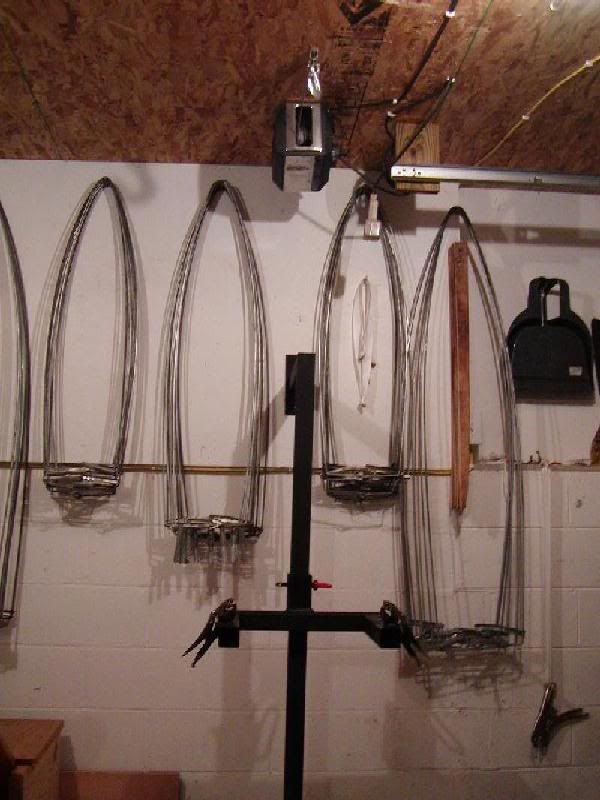 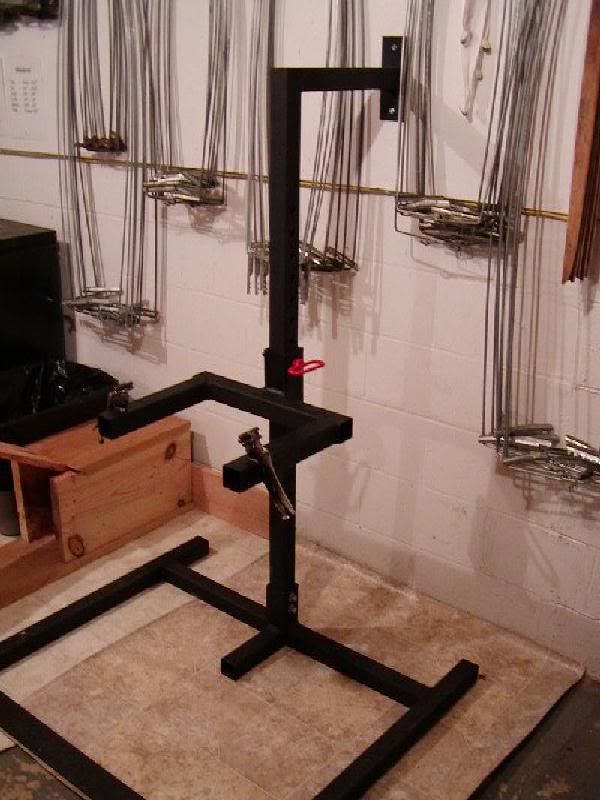 MM1 |
|
|
|
Post by Stef on Feb 28, 2006 21:04:23 GMT -6
Here's mine...  |
|
|
|
Post by jeffc on Feb 28, 2006 21:08:34 GMT -6
I think I'm liking yours the best so far Stef. Can you give me dimensions of that thing
Jeff
|
|
|
|
Post by jalexander on Feb 28, 2006 21:23:26 GMT -6
Anyone got a pic of an animal attached to the skinner?
|
|
|
|
Post by cflann on Mar 1, 2006 8:39:13 GMT -6
Stef,
Whatdya use to attach the hide to the lower end? I assume you just use a metal gambrel or something similar on the "winch" end?
|
|
|
|
Post by Stef on Mar 1, 2006 9:51:21 GMT -6
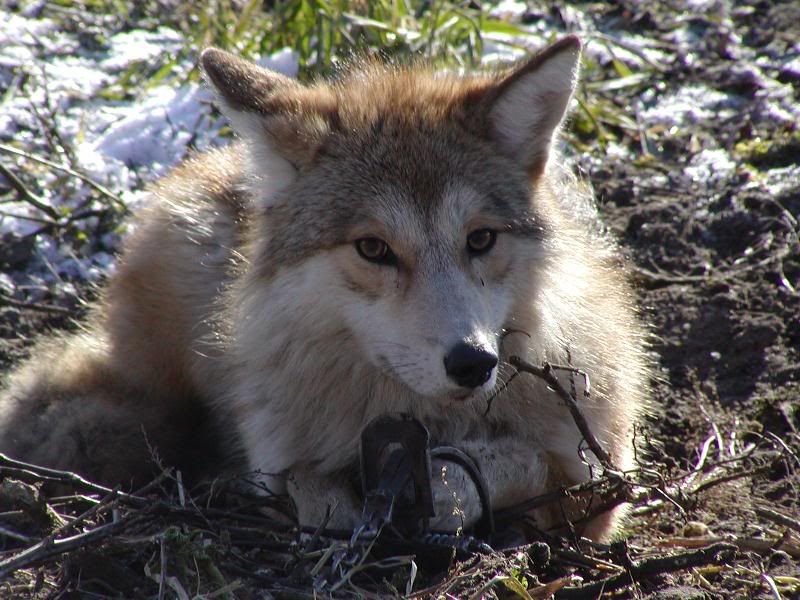
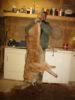
The total length is 14'ft.... 12ft can work but its just too tight with the bigger eastern coyotes or wolves. The machine is 1 piece with the exception of the legs. They are bolted on. This thing can be build in section and it is what I will do even if I have the room for storing it. I will cut it soon and do what I said... How? Just have to think about it a little...LoL BTW... I noticed while skinning horizontally that there's a lot less blood problem skinning coyotes that way. I use the golf ball method with my machine As you can see on the 1st picture... I had build a little gambrel (without hooks).... Anyway, never used it.... I just use a ¼" nylon rope and pass both hind legs in the loop and that's it. Fast, cheap and strong. I will have to remove that part and just weld a stopper for the rope. 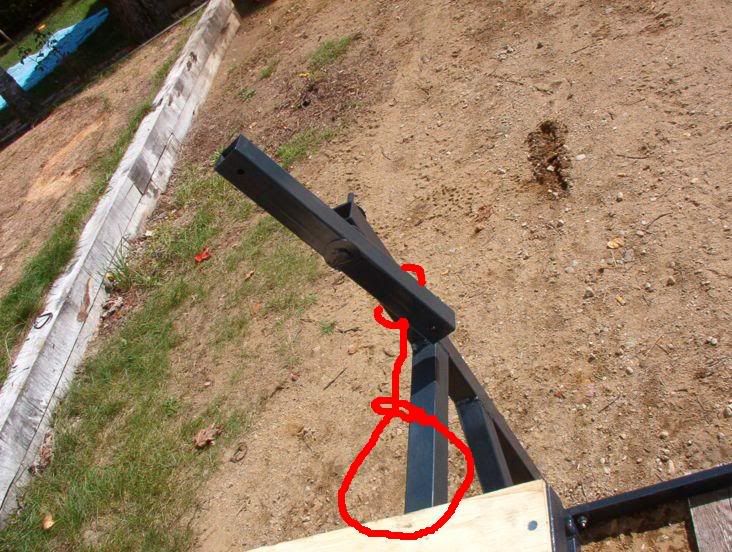 Here's a few more pics......  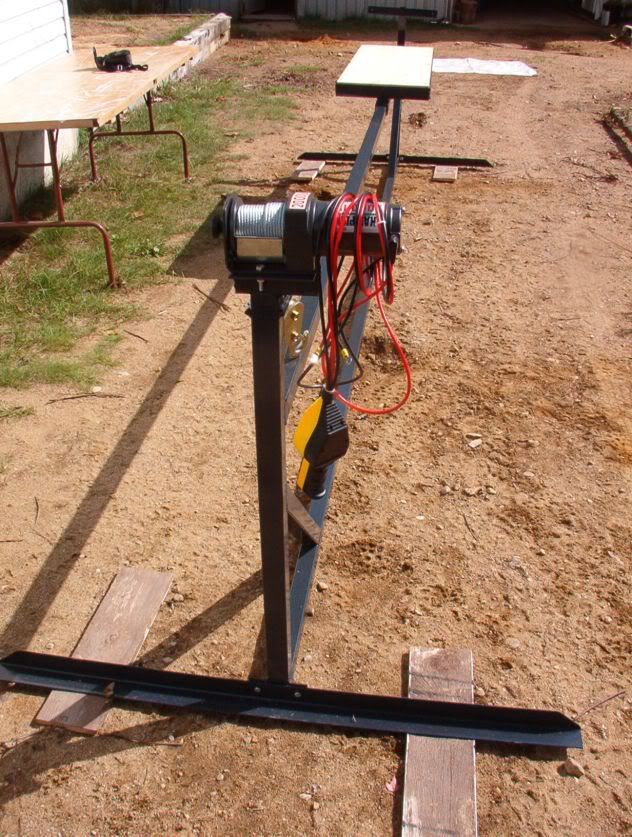  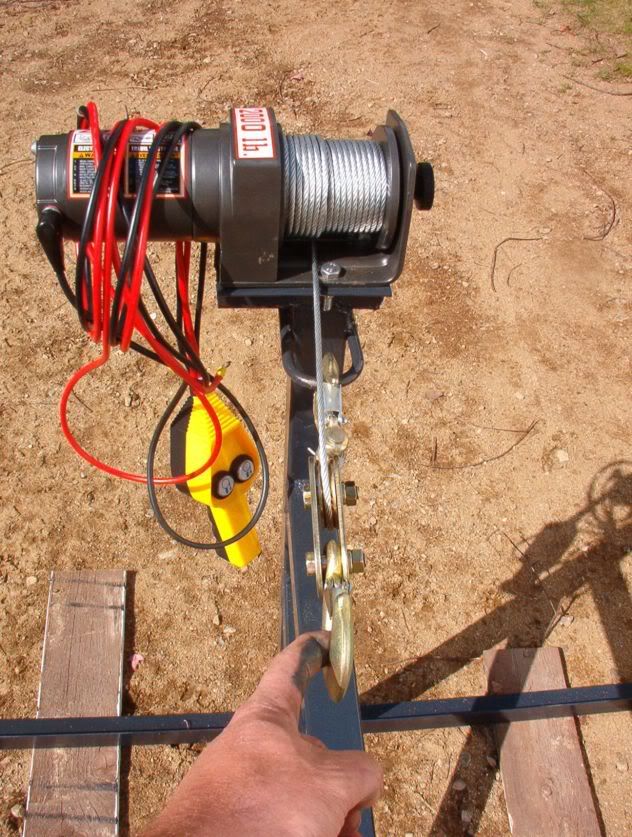 Stef |
|
|
|
Post by Stef on Mar 1, 2006 9:54:39 GMT -6
The tubing is 1¾"X "100 thousandth thick"
|
|
|
|
Post by Zagman on Mar 1, 2006 16:20:40 GMT -6
Here's mine....the boom goes up into the ceiling 13-14 ft I guess.....I lengthened it this summer and did not have to unattach and re-attach a single coyote this year.....I used to bottom the boom out with the bulk of my coyotes.....  Here's looking up into the ceiling, which was framed and a dog house built around to for keeping in the heat.... 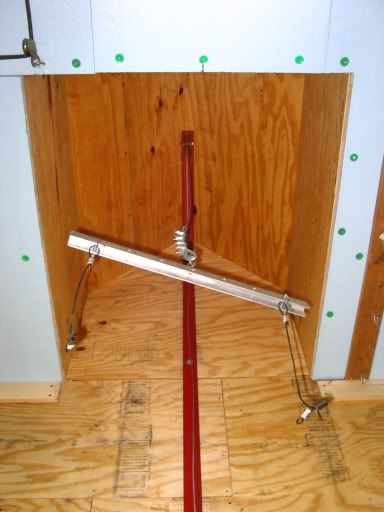 And here's where a mad-scientist apprently works....  Have to look for animals on it from this year.....dont really take many pics once they are hangin' vertical. Zagman |
|
|
|
Post by td on Mar 1, 2006 16:45:50 GMT -6
Ours looks a lot like Zags, but where the opening is in the table top, there's a hinge plate for holding the tail. Works great. I just use a meat hook and hook both hind legs through the tendons and clamp the tail with the plate. Quick and easy. Trying to figure out the pic thing. Maybe later.
|
|
|
|
Post by renny1 on Mar 2, 2006 6:56:30 GMT -6
Stef,
I can see your skinning machine is a good design and bet it works like a charm. Was just wondering why you decided to go horizontal? Is it easier somehow? Can you get around to make cuts ok? Are they belly up? Down? When you use the golf ball method, do I understand correctly that you use one golf ball and both hind legs go into the rope? Is the small sliding table so you can make the cuts all the way around if needed? Anything else you can add would be greatly appreciated. Thanks!!
|
|
|
|
Post by thebeav2 on Mar 2, 2006 8:26:32 GMT -6
I'm back from the rigors of long lining beaver and otter.
All skinners that are pictured are great and show some real workmanship.
Cable with a slip noose system for hooking up legs and fur Is the way to go It's fast and simple and and never slips or tears the fur or pulls out the tendons.
I build 12 or so slip noose set ups and when i open up lets say 12 coon I just pre set all the slip nooses on the fur part of the coon. Then i just lay them down on the skinner and drop the washer In the slot and then hook up the hind legs.
The problem with some vertical skinners with the vise grip set up is the the clamping points are to far apart and you can't hook up otter or fisher. I feel that the clamping distance shouldn't be more then 10" apart.
This year I will be producing a break down model that can be used In the horizontal or vertical position.
The advantage with the vertical skinner Is that you can hang your animal and open It up and then re hook and start skinning ,with the horizontal skinner you have to open at another location and then move to the skinner. both have their good points.
If your Interested In a very cheap skinner that's all you need Is a 2x12 plank about 12' long, mount the winch on one end mount your hook up point on the other end and set the plank on two saw horses and your good to go. You could even use It In the vertical position. Just lean it against the wall.
|
|
|
|
Post by Stef on Mar 2, 2006 11:36:44 GMT -6
A pic is a 1000 words 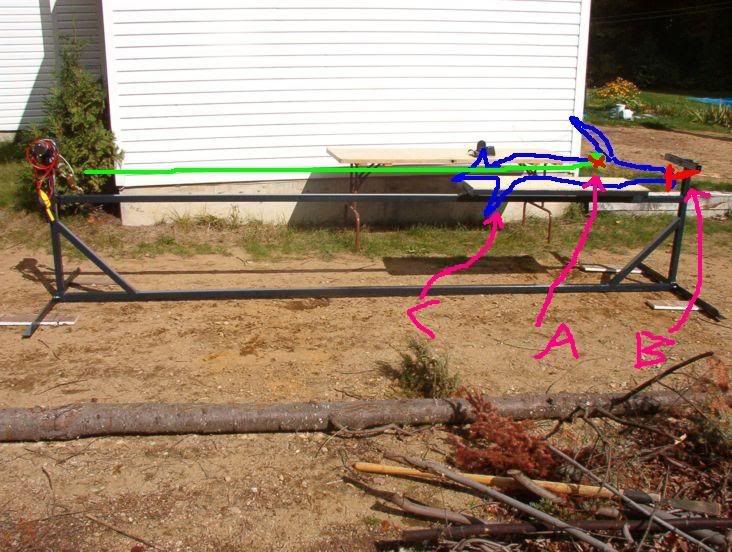 A= golf ball attached on the winch cable B= Attachment for the rear legs ( one ¼" nylon rope for both legs. C= coyote Have a 2 floors garage and did not want a break the ceiling because i knew that I needed at least 12-14' ft to get the job done with coyotes. Yes but you need to start the rear legs on a vertical gambrel first.... its easier. No ( check pic ) but while pulling... coyote can be turned easily (½ on the right and ½ on the left) when needed. Think that with the picture above, you'll figure how it works?  Stef |
|
|
|
Post by k9 on Mar 2, 2006 12:25:37 GMT -6
Barrel filled with concrete, set bolts put into wet concrete for angle iron. Also I put in an eyebolt in the middle which so far I never use. Also set bolts set into wet concrete for bench tail stripper. Wide vice grips used to clamp hide to iron that sticks out front, animals feet hooked into gambrel. May set up a flop plate system this summer to do away with vice grips. Barrel is heavy but can be moved over to a corner in the off season. Normally the bench off to the side that has junk on it now, is where I lay about 8 or 10 coon at a time. I sit in a tall stool which is most comfortable for me, and have the winch control and other items hanging right where my hands normally are positioned. I lay the coon across the front and open him, cut the tail and hang him up. If you can see the TV set on straight ahead, I have cable TV wired into my shop for those longer skinning nights.  Motor is mounted to back, is bolted on not welded so I can remove it easily if need be. There are no welds in this set up, and it can be taken apart other than the concrete in the barrel.  Here is a closer view of the top. I put cardboard on it when skinning which is why is doesn't have a lot of blood on it. I strip the tail last which is backwards. I use the handpruner hanging there to slip between the tailbone and skin at the base of the tail and lop it off. I then skin the whole animal then grab the tail bone with a plier, and strip it on the bench stripper. Faster for me, and saves juggling theweight of the whole animal's body and saves tired fingers from trying to push them between the tail and the skin. If only skinning one not a big deal, but if skinning 40 or 50 every saved step counts.  |
|
|
|
Post by renny1 on Mar 2, 2006 14:58:57 GMT -6
Stef,
Yes I see, Thank you!
|
|